Are you a
Homeowner?Are you a
Homeowner?The below provides an overview of installing your carbon monoxide alarm, but please refer to each alarm’s manual for tailored guidance.
Ideally, an alarm should be installed in every room containing a fuel-burning appliance and every sleeping room. Additional alarms may be installed to ensure that adequate warning is given for occupants in other rooms, in which they spend considerable time whilst awake and from which they may not be able to hear an alarm in another part of the property.
WARNING: This alarm will only indicate the presence of carbon monoxide gas at the sensor. Carbon monoxide gas may be present in other areas.
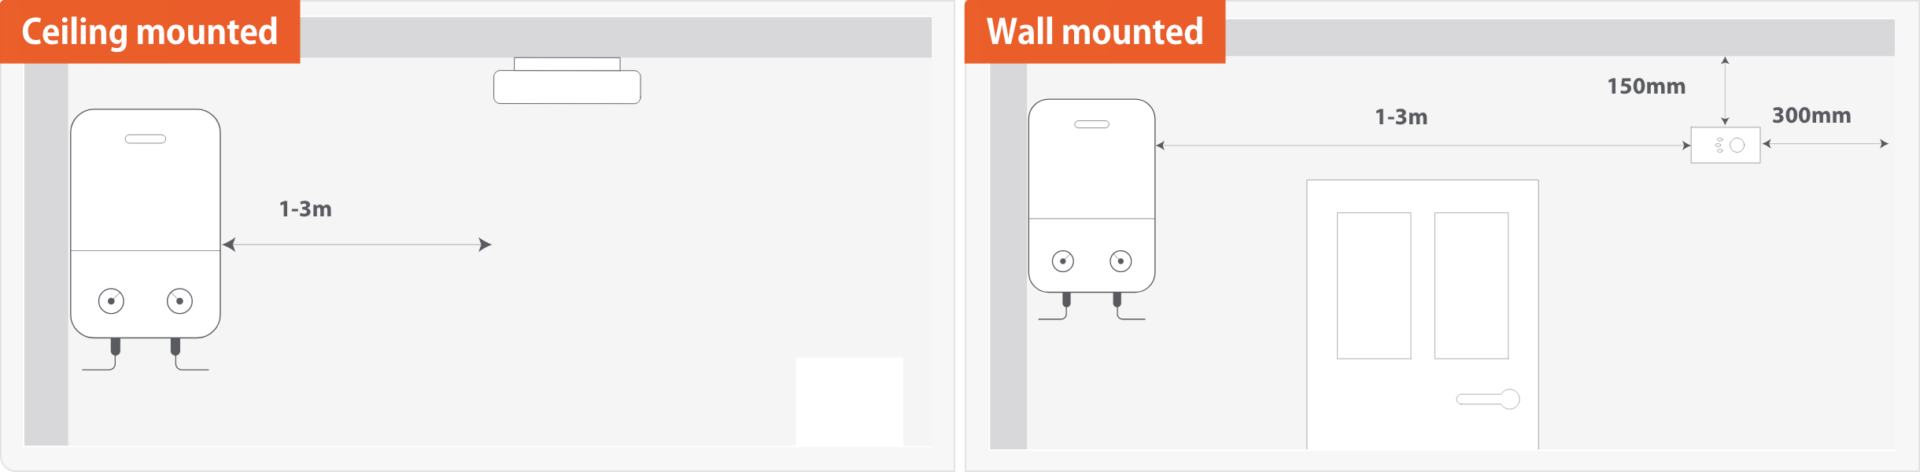
For alarms located in the same room as a fuel-burning appliance (for both wall and ceiling mounted alarms) the following applies:
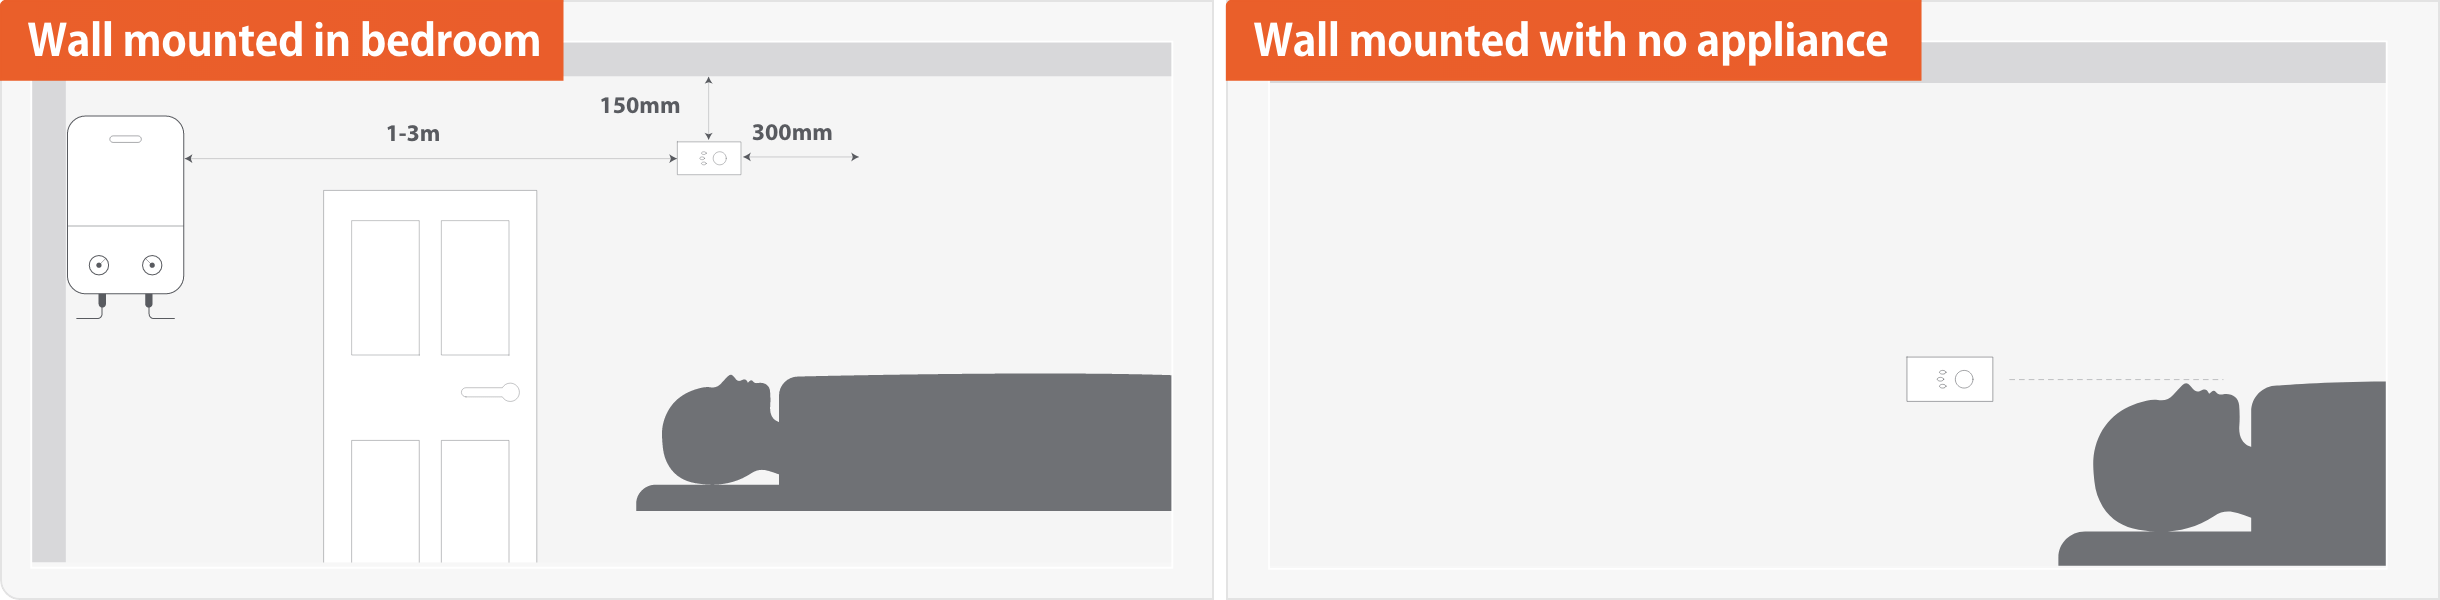
The alarm should be at a horizontal distance of between 1 m and 3 m from the potential source.
If there is a partition in a room, the alarm should be located on the same side of the partition as the potential source.
Carbon monoxide alarms in rooms with sloped ceilings should be located at the high side of the room.
In addition to the above the following must be observed if the alarm is located on a wall:
It should be located close to the ceiling
It should be located at a height greater than the height of any door or window
It should be at least 150 mm from the ceiling
If the alarm is located on the ceiling:
It should be at least 300 mm from any wall and any ceiling obstruction e.g. light fittings.
Alarms located in sleeping rooms and in rooms without a fuel-burning appliance should be located relatively close to the breathing zone of the occupants.
For installation settings, e.g. caravans, boats and tents check the instruction booklet in the ‘Resources’ tab against each device.
Free-standing installation: The base of the alarm has been designed to allow it to stand freely on a shelf where required.
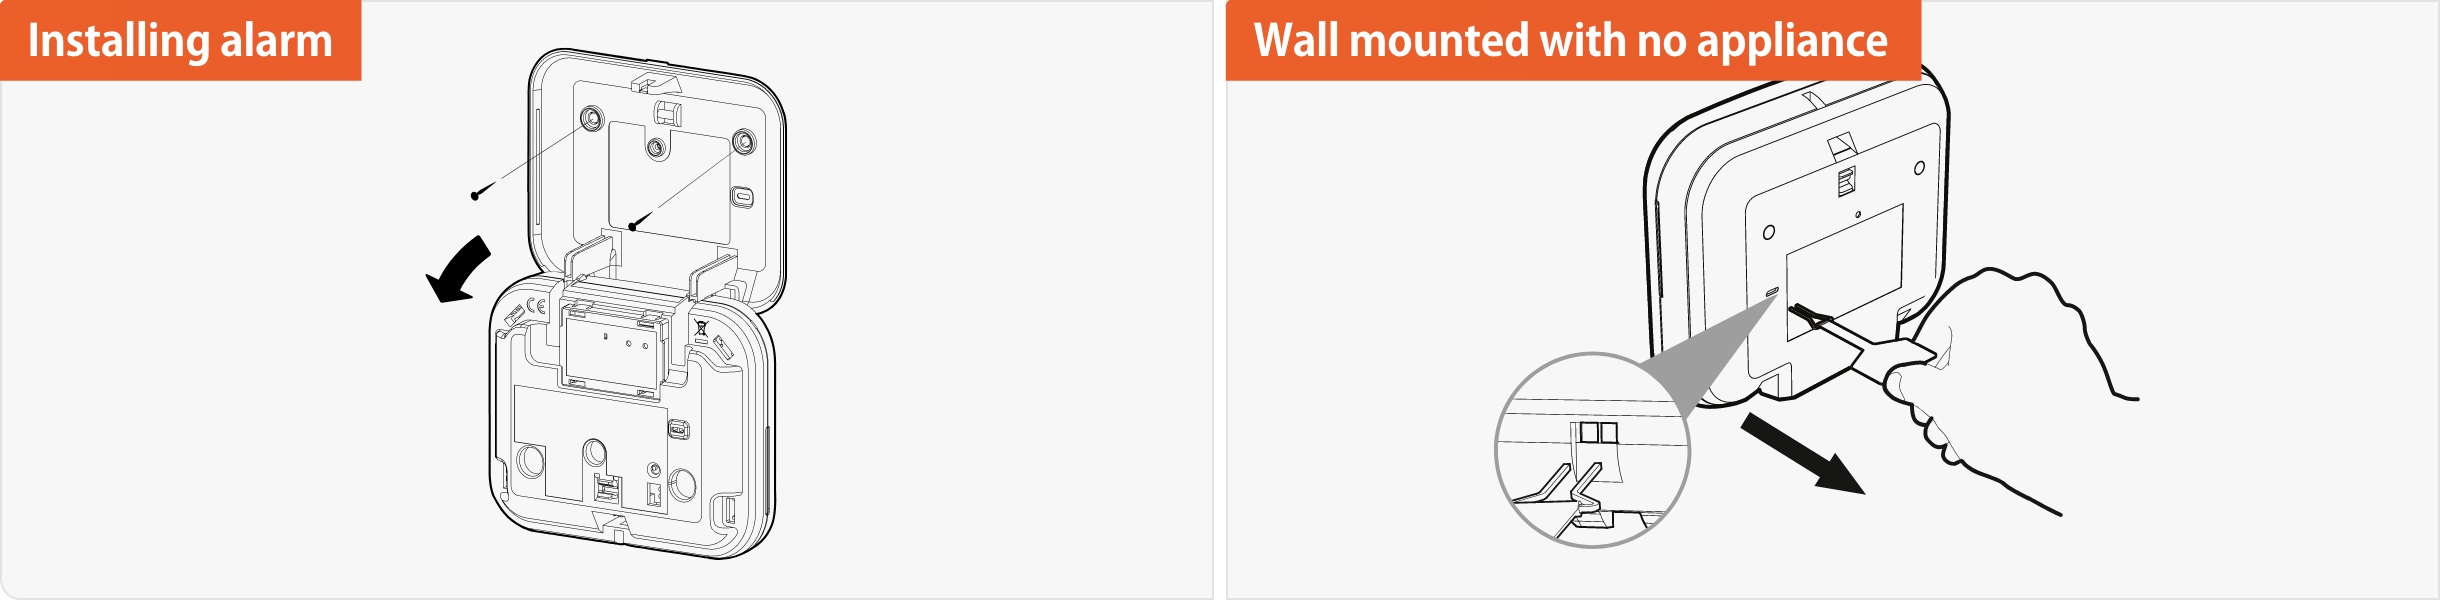
Wall-mounted installation:
Refer to the manual within the packaging of the alarm for specific instructions and use the mounting kits provided.
If your alarm is not a sealed battery alarm, then install the batteries following the steps within the manual.
To activate the alarm:
Remove the disabling clip by pulling it out of the alarm and retain the disabling tab for future use.
When the alarm is activated the Power LED will begin to flash green once every minute to indicate that the alarm is fully operational. Test the sounder, power pack and circuitry by pressing and holding the centre of the Test/Silence button briefly to confirm that the alarm is operating correctly. The sounder will sound as soon as the button is pressed, and the Alarm LED will illuminate red indicating that the sounder is working, and the power pack is providing power to the unit.
Please note – it can take up to 1 minute for the green LED to flash to confirm your alarm is active. Press the test button to test the alarm and hear the alert sound. The alarm will not sound before the 1 minute activation period is complete.
If you can't find what your looking for on our blogs and looking for further guidance and advice, our UK-based Customer Support team are on hand all week from 8:30am until 5:30pm, they can answer any further queries you may have on our products, solutions or services.